We accept:

How to add an extra hard drive to your PC
This form is protected by reCAPTCHA - the Google Privacy Policy and Terms of Service apply.
Don't have an account?
Creating an account has many benefits: check out faster, keep more than one address, track orders and more.
 How to add an extra hard drive to your PC:
This quick guide teaches you how to install a second hard drive in your PC. Keep in mind that installing a second hard drive in modern laptops is not possible. If you don't want to go through the hassle of installing a second internal drive, you can always just use an external hard drive for your PC.
Method 1: Adding an Internal Hard Drive:
1. Make sure that you have room for a second hard drive
Typically most Gaming PC's will have space for a second hard drive, but you should always check beforehand.
2. Buy a SATA internal hard drive for your computer:
If you don't already have a SATA hard drive that you want to install, buy one before proceeding.
You'll generally want to buy a hard drive made by the same company which made your computer (e.g., HP).
Some hard drives aren't compatible with certain computers. Before buying a hard drive for your computer, search for your computer's model and the hard drive's name (e.g., "HP Pavilion compatible with L3M56AA SATA") to see if they'll work together.
3. Turn off and unplug your computer:
You should never attempt to alter your computer's internal components while the computer is running, as you may seriously harm both yourself and the computer.
Some desktop computers will take a couple of minutes to finish running after unplugging them. If this is the case for your computer, wait until the computer's fans have stopped running before proceeding.
4. Open your computers case:
This process will vary from desktop computer to desktop computer, so consult your computer's manual or online documentation for specific instructions if you don't already know how to open the case.
You'll usually need a Phillips-head screwdriver for this step.
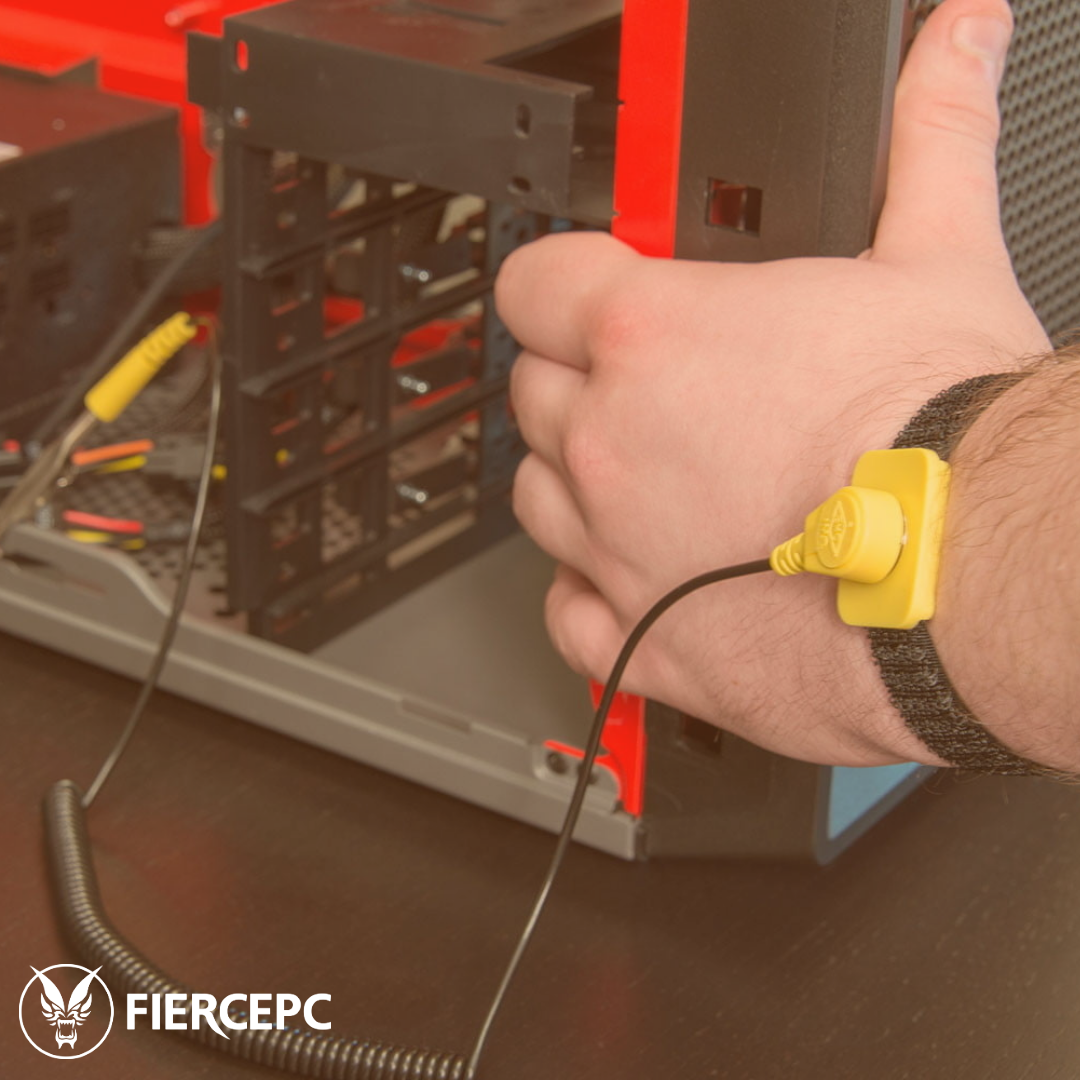
5. Ground yourself:
This will prevent accidental damage to your computer's sensitive internal parts (e.g., the motherboard). See our guide on how to ground yourself correctly HERE.
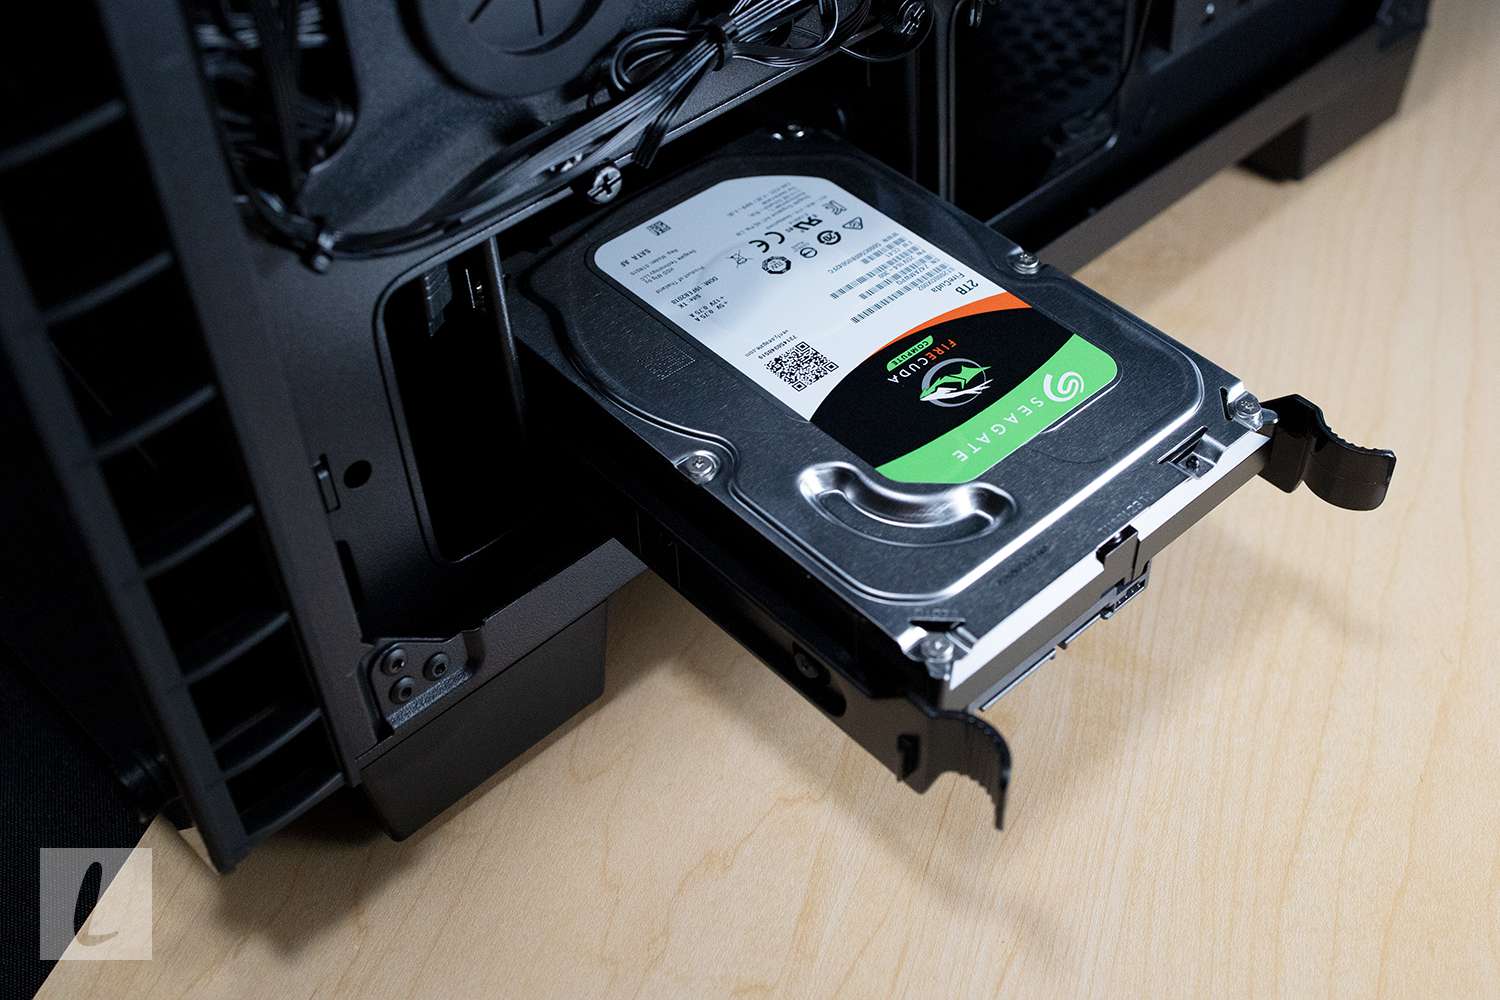
6. Find an empty mounting space:
Your primary hard drive will be mounted in a rack that's somewhere in the computer's case; there should be a similar, empty rack near the hard drive. This is where your second hard drive will go.
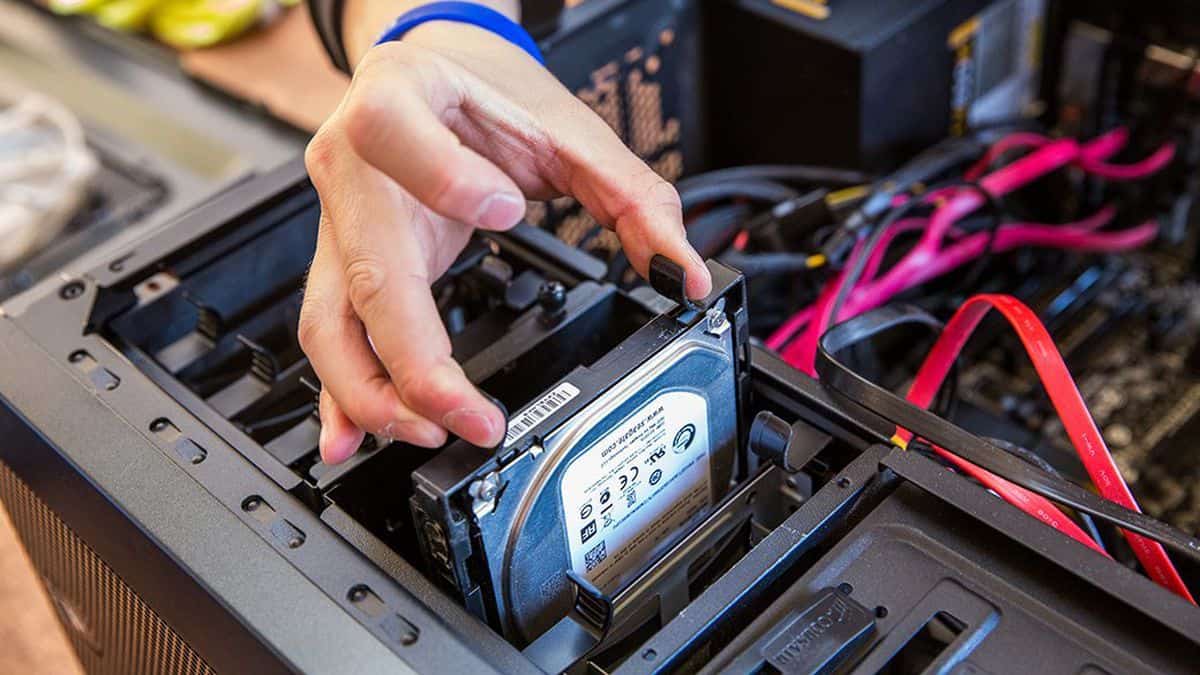
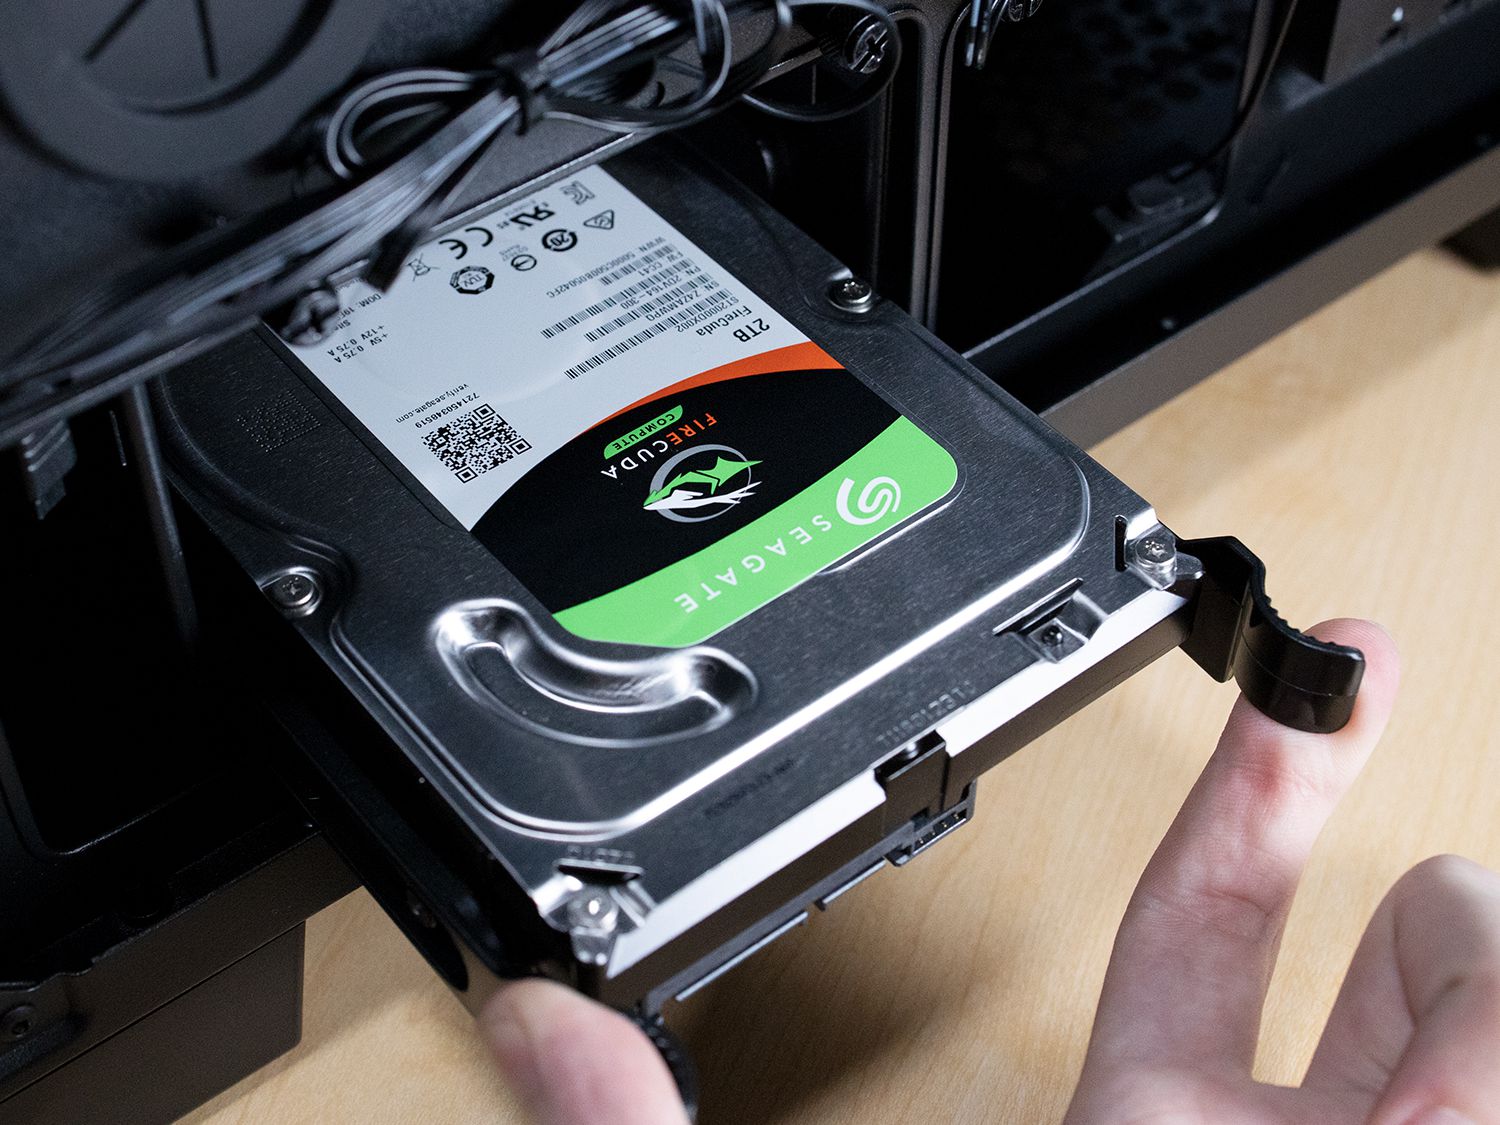
7. Slide your second hard drive into the mounting space:
It should fit under or next to the primary hard drive, with the cable side of the hard drive facing you.
In some cases, you'll have to tighten the mounting space with screws.
8. Find the hard drive attachment point:
Follow the current hard drive's cable all the way down to where it plugs into the motherboard, which is a green panel with circuits on it.
If the hard drive's cable resembles a ribbon, your current hard drive is an IDE-type hard drive; you'll most likely need an adapter to plug the second hard drive into the motherboard.
9. Attach your second hard drive:
Make sure that one end of the second hard drive's cable is firmly plugged into the second hard drive, then plug the other end of the cable into the motherboard. It should fit into a slot next to the primary hard drive's cable.
If your computer's motherboard only supports IDE connections, the slot on the motherboard will be a couple of inches wide. You can buy a SATA to IDE adapter that plugs into this slot, at which point you can plug your hard drive's cable into the adapter's back.
10. Attach the second hard drive to the power supply:
Plug one end of the second hard drive's power cable into the power supply box, then plug the other end into your second hard drive.
You'll usually find the power supply at the top of the computer case.
The power supply cable resembles a wider SATA cable.
11. Make sure that all of the connections are tight.
If your second hard drive isn't properly plugged in, your computer won't be able to recognize it later.
12. Plug in and turn back on the computer:
Now that your second hard drive is physically installed, you'll need to allow Windows to recognize the hard drive.